Managing Project Items
Estimated reading time: 4 minutes
Encore RPG for Visual Studio includes templates for Encore source files containing new “empty” classes or interfaces, which can be included in the project. You may also add other project item types associated with the C# project system, including C# code files.
C# code introduced by non-Encore items is not currently accessible to the Encore language service or Encore compiler.
Managing source files in Encore projects is basically the same as any other Visual Studio project, and includes change management options with Git integration. Getting started with Git is easy in Visual Studio.
ASNA recommends Git source control management.
Here are some walkthroughs to introduce these Encore development features.
Add a new Encore Class
To add a new item to an Encore project, use the Add New Class… or Add New Item… commands on the Project menu.
Ensure the project or one of its sub-items is selected in Solution Explorer. Alternatively, use the Add menu on the project’s context menu (select the project and Right-Click) then select Class… or New Item.
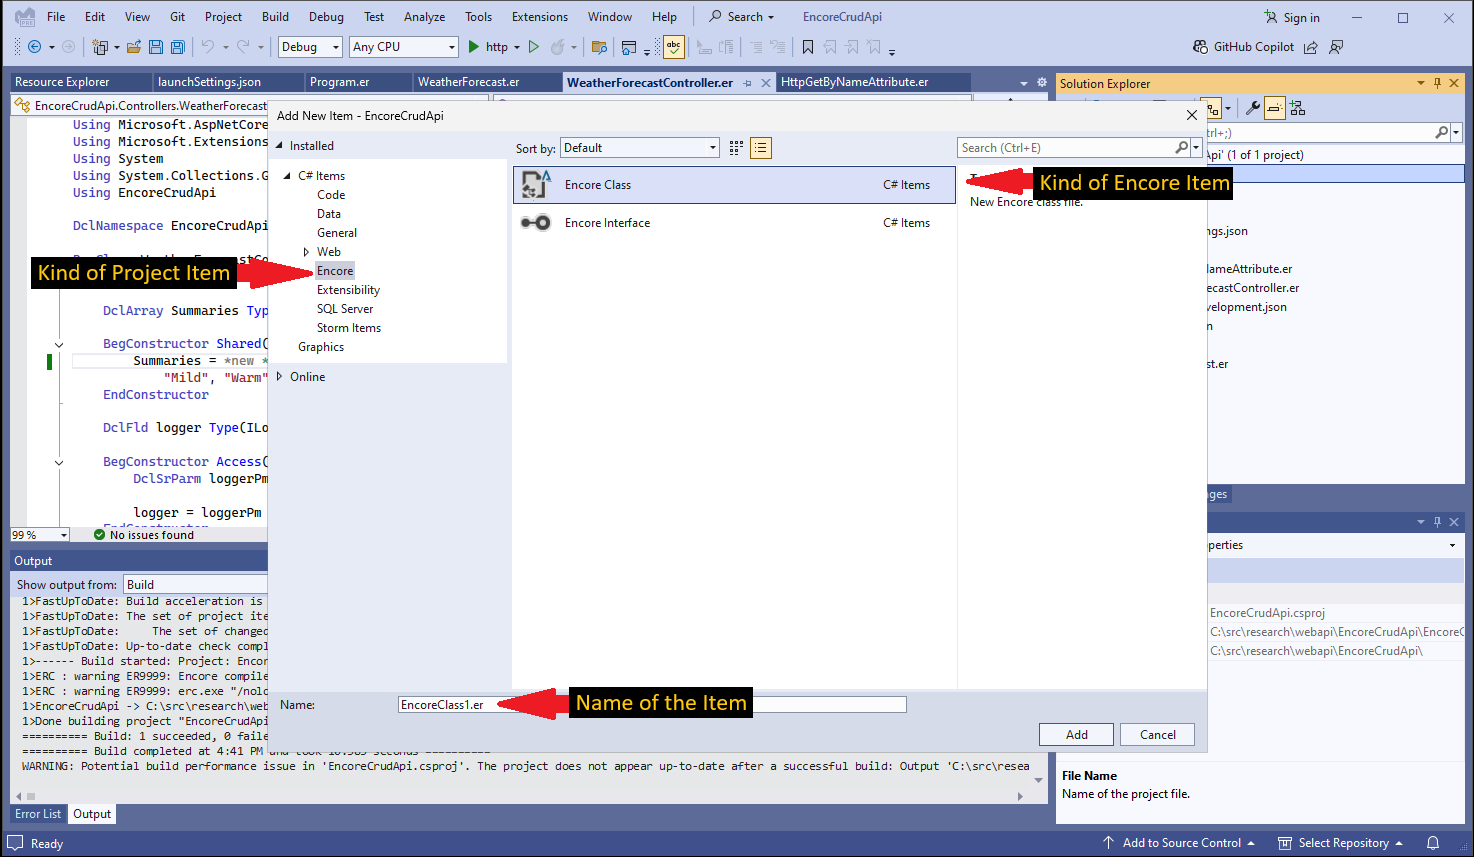
The Encore source code items available to be added are shown in the Add New Item dialog, shown below.
- Select the kind of project item to add (default “Encore”).
- Select from the available item choices (Encore choices are class or interface source files).
- Give the item a useful name, for example, the name of a new class.
- Click the Add button.
Remove Items
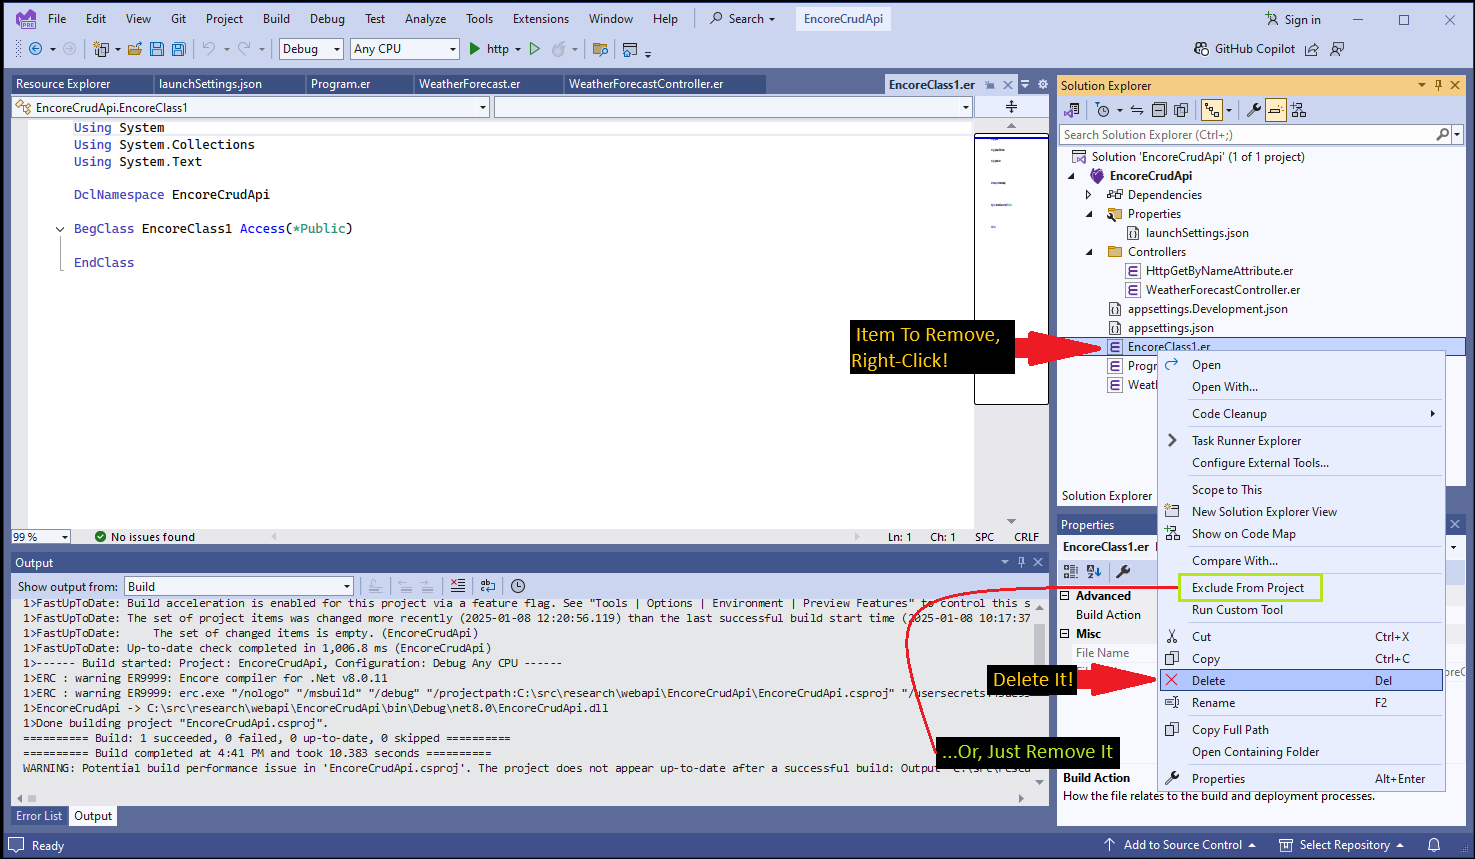
Deleting an item from the project is a simple as selecting the item in Solution Explorer and pressing the Del key. This command also appears on the context menu when you Right-Click the item to be removed, as shown below.
CAUTION! Using the Delete command not only removes the item from the project, it also removes it from the file system. Source control recommended! Alternatively, use the Exclude From Project command shown on the menu below. This removes the project item without deleting the source file.
Create a Git Repo
Creating a source control repository for your projects makes good sense, particularly as the project grows in complexity. It also helps coordinate changes when projects are shared with others. Here is a quick walk-through to create a local Git repository in Visual Studio for an Encore solution.
If you are not familiar with Git, there can be a learning curve to get the most out of the tool. Learn more about Git the online documentation at https://git-scm.com/.
-
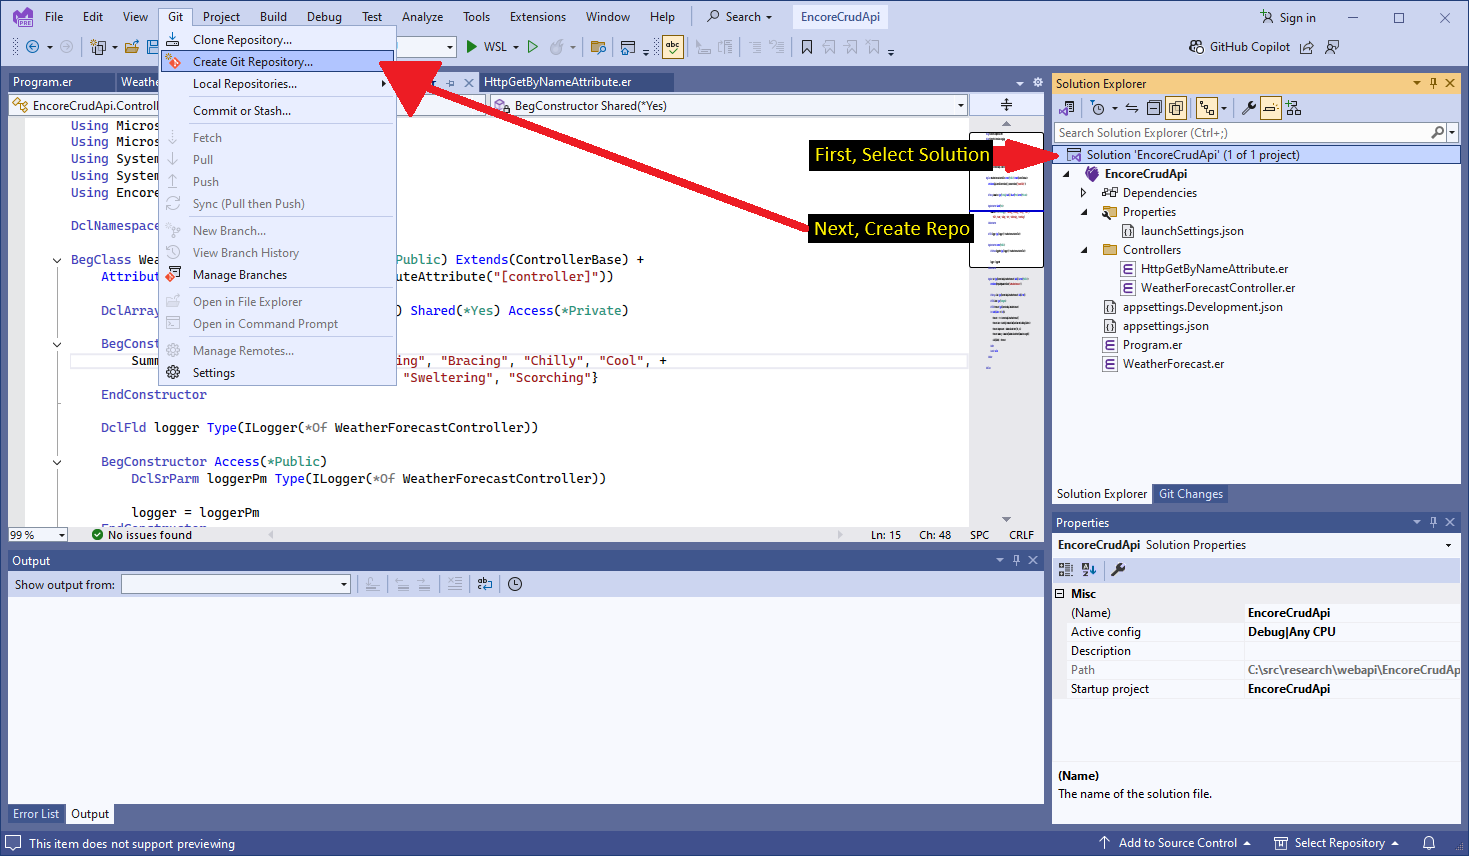
Select the Solution node in Solution Explorer. Then, on the Git menu, select Create Git Repository….
-
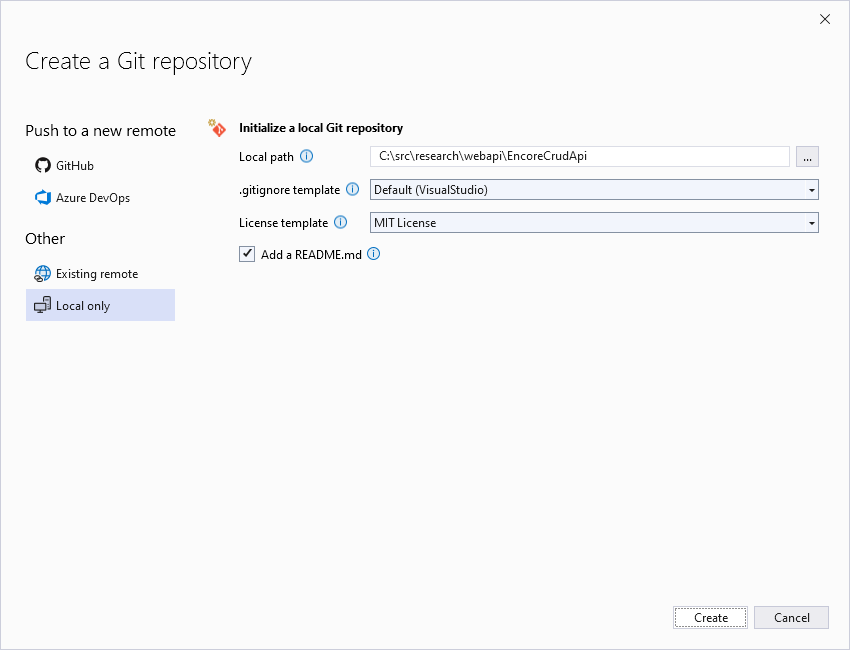
The Git repository “wizard” dialog should appear similar to the one below. In this example, we chose “Local only” for the “Push to a new remote” option. We also elected to include the “MIT License” template and add a default “README” file. Click Create to create the repository.
Beyond scope here is creation of a “remote” repository. This option is recommended when the project is to be shared with others. Credentials are typically required to access a remote server such as GitHub. You can add a remote GitHub repo later, if desired.
-
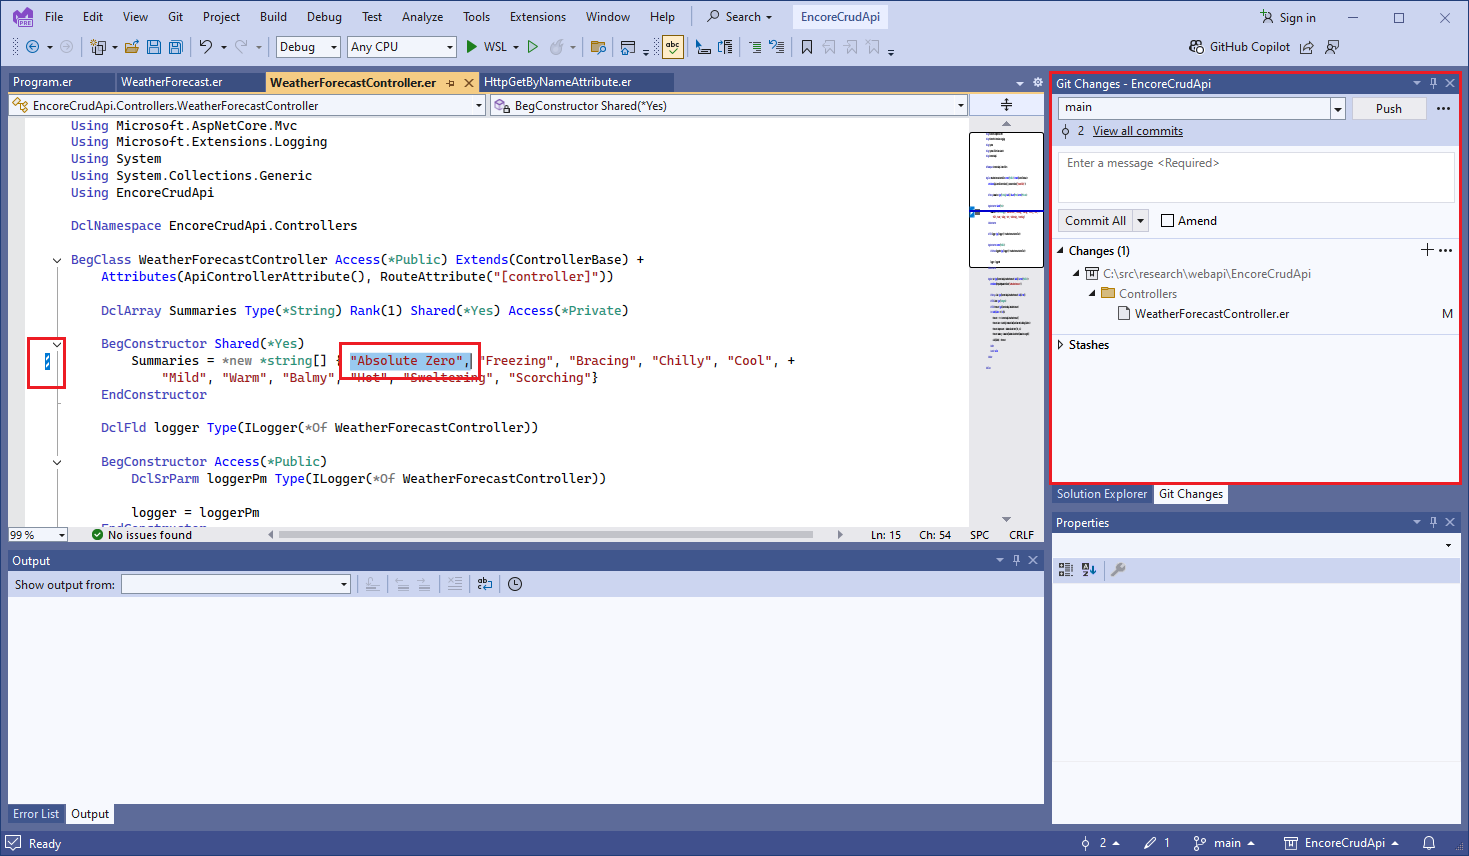
Modify something in the project. In the example shown below, we added the string “Absolute Zero” to an array. Note that the Git Changes window shows that the edited source file has been modified. In this window, you can commit, shelve (a.k.a. “stash”), or roll-back the modification to the repo. Also note that the editor shows a glyph in the left margin indicating that the corresponding line was changed.
Many of the most important features of Git not shown here are extended into the Visual Studio IDE and third-party Git tools. Learn more about Git integration in Visual Studio.
Additional Information
Find out about the new Language Concepts when using Encore RPG.
Describes the Encore RPG programming language reference.
Getting Started with Visual Studio
Learn to code in Visual Studio
IntelliSense® is a registered trademark of Microsoft Corp.